Washington Acres


Leave a comment

Front Yard Landscaping Plans

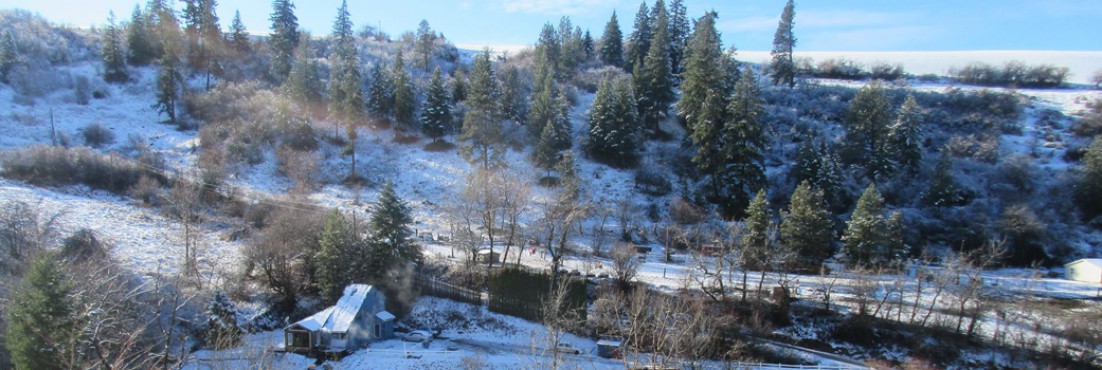
Now that the cold weather is gone, we started ignoring all indoor projects and are focusing on projects outside. Since the front of the house is pretty much done and the giant garbage pile is gone, I thought it’s time to do something about the awkward path and lack of landscaping.

fronthouse

I completely lack any originality when it comes to landscaping, and if it was up to me I would just plant a few bushes in the front, throw some mulch down, lay new sod, and call it good. Kind of like our first house.

Front of house

Front of house

But since this is our “forever” house, I really thought it would be worth it to hire a landscape designer. Of course my husband thought it was a stupid idea and a waste of money. I didn’t care and did it anyway.

After some quick searching on the internet, I realized this service is not cheap. I’m talking $800+. As my landscape design dream was beginning to fade, I found http://upwork.com/. It’s a website where you can hire freelancers from all over the world. I simply posted a photo of my project with a short description and had almost 20 people “apply” for it within a few days. The cost varied from $50-$300.

It was definitely a little hard to select the right designer with so many interested in my little project. I looked at all their portfolios and some had some amazing work. But most of their projects were things like giant hotels or resort pools. I wasn’t confident they could design something for our little house in the mountains that I would like.

One designer stuck out because her portfolio impressed me with residential landscape projects. So I decided to give it a shot. The process was so simple. I simply provided measurements, photos of the front yard, and photos of landscaping I like. I wanted the colors to be a variety of greens and purple.

The designer did a fantastic job! There is no way I would come up with this on my own. And the best part? It only cost me $110. Seriously, if your landscaping is in need of a little help, get in touch with her! You can find her here: https://www.upwork.com/freelancers/~010407c1a6c547c5eb

16

As much as I’d love to start tearing out the yard on my next day off, I have to hold off until we get some estimates for the septic expansion. The front yard will have to be dug up when that work begins, so if we’re going to do that soon I have to wait on my nice new landscaping. But if we’re not getting to that for a couple years, I’m going for it and will just fix whatever get torn out. But at least I have a design plan to forward to!


2 Comments

Holy Moly Money Pit

We’ve officially surpassed $60,000 in renovations and repairs! After adding up our most recent Home Depot purchases, our current total is $60,009. Despite this, the toilet is still sitting on 2x4s and we have a utility sink for a kitchen. Yikes.

Good news is there isn’t a whole lot left to do. Just a bit of drywall finishing, flooring, window trimming, and kitchen and bath finishing. Our contractor stopped by over the weekend to make a plan for the subfloor replacement. We have two weekends before work begins and it would be really nice if I got all the drywall done and walls painted before new hardwood goes in. Too bad I suck at drywall.

But looking back, I think we’ve accomplished much in the past two years and we’re getting close! The outside is almost finished with just a bit of siding left to go on in the back. The new windows, roof, and roof overhang really made a huge difference.

2year_exterior

Other than a lot of drywall work being done, most of the interior projects haven’t progressed much in the past year. We did, however, get some new carpet. The carpet on the spiral stairs was begging to be replaced since we moved in. I finally found a good carpet guy and it’s done! I was spraypainting the treads as he was taking them off, and then did the whole staircase as he left for a lunch break. Note to self: Do not spraypaint indoors ever again. Everything was covered in a black film after the paint cloud settled! At least the stairs are looking better. (Pardon the mess, it’s a never ending battle!)

2year_stairs

New carpet was also put in the sunroom. We had installed wood laminate in there not too long ago, but cheap laminate does not go with fancy new hardwood. So I took it out and donated it to the carpet guy who was doing some free work for an old lady with a rotten floor that didn’t have any money. I got to see the old vinyl underneath everything one more time!

2year_sunroom

Although the house is still mostly a wreck, most of the materials are paid for and so is our contractor (who only has maybe two weekends worth of work left to do for us). I’m hoping we’ll be done within the next 6 months. I know, I’m overly optimistic. But I’m looking forward to a break from house stuff for at least a year. You know, so we can work on landscaping and furniture building projects instead. Plus Nick has a new toy to play with. 🙂

tractor


Leave a comment

Exterior Progress

Great news! We didn’t have to tear down the house! I hired a structural engineer to take a look at everything, and he said it’s not terrible, but it’s not good. It looks like we have to do some beefing up to a structural beam. But the work can be done from the inside, so we got the thumbs up to carry on with roofing and siding.

The roof is 95% done (just waiting for one last piece of flashing to arrive), but the siding has lots left to do. The front is almost done, but the rest of the house is 50% done.

FrontBeforeProgress

Unfortunately, the rotten bedroom bump-out addition had to go. We had plans to re-build it, but our contractor ran out of time so he walled it up. Hopefully we can get to it next year.

Nick rebuilt the dry-rotted deck this summer. No more painted plywood! And the siding in that area was just finished so I caulked and painted it this weekend. I LOVE the color, Nick hates it. But he eventually got tired disagreeing with me so I won. 🙂 I spent most of Sunday sitting on the front porch admiring the only finished area of the house.

DeckBeforeAfter

We are months behind schedule, and I can’t paint when the temperature gets below 50 degrees. So I hired one of our contractor’s guys to help me out. He seemed to think it was only going to take him a couple days to do the whole house. It took me two days to caulk that small area by the deck! We’ll see. I’m just crossing my fingers it gets done before the cold hits!


Leave a comment

Renovation Disappointments

You know those renovation shows where they start out all happy and looking forward to getting a bunch of stuff done? And by the end of it, they have to scrap like half of everything they wanted because there’s always some unexpected surprise that was uncovered during the reno? I always thought that it was added-by-tv drama. And after our misadventure with our current reno, I know it’s not.

Our contractor is great. I couldn’t have found a better guy. He was going to put up all the siding, fix the foundation, replace the roof, and install a new subfloor on the main level. And it was going to be done by the end of June, early July at the worst.

That is, unless there were “surprises.” We completely expected some of these, like replacing some sheathing here and there for the siding, and even maybe the entire roof needed new sheathing. No biggie.

And then the bedroom bump-out addition was ripped off. It was completely dry-rotted and it had zero foundation under it. So we decided to go ahead and rebuild it right, and the subfloor plan was scratched off the list because of time constraints.

The roof was also scratched a few weeks before that because our contractor’s insurance terms changed since he took on our “project.” He could no longer replace existing roofs. But no biggie, my husband could do it. I just hired some guys to replace the sheathing so he could go up and get it done quick before it starts to rain again.

And then more dry rot. Lots of dry rot. Half of the front of the house and most of the back will need all new sheathing.

And then the roof. Oh boy, that roof! A whole big mess was discovered when old rotten sheathing was coming off. Whoever built this thing actually NOTCHED a structural ridge beam to make it fit where he wanted it to fit. And the roof joists were made of scrap that was nailed and sistered together to make them “work” so now they’re broken and not doing what they are supposed to do (THAT’S why the house swayed on windy days!). And all the 2×4 exterior walls really need to be 2×6 walls. So there’s a structural nightmare going on.

Before finishing drywall, putting in the rest of the kitchen, or getting the toilet off 2x4s, we literally have to replace EVERY exterior wall and the entire roof, joists, beams and all, before the house is sound.

We already sunk over $50,000 into the house, but we may not have even scratched the surface. We had a serious sit down with our contractor, who said if it was his house, he’s tear it down at this point and start again. It’s rotten. We are living in a rotten house.

And that is our dilemma right now. Do we fix or do we raze? We think it’s a cool little house worth the effort to save, but we’re waiting on a number from our contractor. Or he might just run away screaming from it. I don’t even know if he would be interested in fixing everything that is wrong.

So right now there is no roof other than half rotten and half new sheathing on broken joists, a huge 10’x10′ hole in the front that is covered with house wrap, no heat, and we have to figure out how the hell we can stay here over the winter. Hey HGTV, do you need a new show? 🙂

HouseAug15


Leave a comment

Hiring Help and Having Hope

I want my house to look like this:

may2015_0

But in reality, I’m stuck looking at this:

may2015_6

And living here while in the middle of a million renovations is tough. Really tough. There’s garbage and building materials everywhere…

May2015_2

Kids end up napping wherever you happen to be working…

may2015_4

And then the mice. Don’t get me started on the mice. Thankfully the house is driving them nuts too so they started killing themselves.

May2015_3

To re-gain some sanity, I decided to call in the pros. Let’s face it- I’m not helping with repairing the existing foundation, replacing the roof with giant pieces of metal, or hanging cement board siding that weighs as much as I do. I like to do things like install flooring or put up trim. I even started liking mudding drywall. You know, projects that don’t need man muscle.

Amazingly, I found a contractor that didn’t run away screaming. Five contractors visited the property before I found The One. And ok, they didn’t run away screaming. They pretended to be interested, or waaaaaay overbid what I wanted purposely to NOT have to do the job. And yes, that’s when I was looking for someone to do a pain-in-the-butt kind of addition. But after I mentioned those that came before him, this contractor said he thought doing the addition project would be “Fun.” Fun! There is hope after all.

I recently found out that my office addition master plan was a total fail because it would be too close to the septic drain field. So if we want more space it’s back to the sunroom side. I’m seriously considering pursuing this again assuming this guy does an awesome job on fixing what’s already here.

As long as there aren’t any catastrophic/expensive surprises, the roof, foundation, siding, and subfloor replacement should be done by the end of next month. That’s soon! And with these big hairy projects out of the way, I can focus on finishing the projects I like to work on. Like killing mice. I mean tiling the floor.


Leave a comment

Addition Miscalculation

We knew when we bought our 2 bedroom 1 bathroom home that it would eventually need an addition. Adding two more bedrooms will allow us to have a guest room and each of the boys can also have their own room. A second bathroom will also make life a lot easier when the kids get older.

Originally, we thought we’d add onto the front. But we would have to move our septic tank and lose precious driveway space. So as much as I liked something like this, we had to come up with an alternative.

add

The only other place to fit an addition is on the side of the house with the sunroom. We figured we can tear out the existing sunroom and replace it with a two level addition. I envisioned something like these houses with a deck overtop most of the lower addition.

I was expecting that the cost would be around $30,000 for a weather-tight shell and a basic design. We could finish it off ourselves out-of-pocket. Boy was I wrong!

Several contractors have visited to provide an estimate, and not one has gotten back to me wanting to do the job. One guy said that something like that would probably be around $50,000 and that we should scrap the deck over the addition and just do a wrap-around deck if we want it to be less expensive. I’d be fine with that, but was never told what it might cost.

That was the first problem. Another contractor said that if we are adding bedrooms, we will probably need to upgrade our septic. I never even considered that. After contacting the County, I learned septic systems are sized according to the number of bedrooms. Our septic was replaced in 1998, but only sized for a two bedroom house.

So on to an engineer for septic planning. I hired one to come out and consult with us and take some measurements. Before his visit, he guessed the upgrade would cost $10,000-$15,000 if it was a regular ol’ system and there would be no complications. Initially I was ok with that, hoping it would be closer to $10,000 (especially if we did some work ourselves).

Yesterday I heard back from him and he said it’s likely that we will need a (spendy) mound system because of our soil type and high groundwater. Not only that, but we will need to move the drainfield from the backyard to the front and there is barely enough space to accommodate an expansion to a 4 bedroom. In other words- one big expensive headache.

Quickly realizing my initial guesstimate was way off, I decided to see what this wonderful addition plan might cost. I was planning on getting a home equity loan (after current work is done and the house is appraisable). The interest rate is at 5% with excellent credit and terms are up to 180 months. Because I was originally hoping to keep the payments around $300, I calculated a few different amounts at the max term to make the monthly payment affordable.

Amount Montly Payment Total Paid
$30,000 $237 $43,239
$50,000 $395 $71,172
$65,000 $514 $92,524

We *might* get away with it at $65,000. But that’s over $90,000 with interest and I’d be paying for it until I’m fifty. FIFTY!!! I don’t want to think about that. Is this addition really worth it? I quickly realized that it’s not.

So what to do? I remembered that the house’s original plans had a second bathroom upstairs in the loft area. I am fine with that. And if we just add an office, we gain an extra room without needing to upgrade the septic. We can always do that later if we decide to convert it to an official bedroom.

We can do the bathroom later- DIY and out of pocket. But I want a contractor to build a weather-tight shell for the office because we are just not experienced enough to do that ourselves. The great idea was to put it where our old moldy storage addition used to be.

Storage area attached to south side of home

Storage area attached to south side of home

There are a couple problems with my new great idea. One, the husband doesn’t really like it. And two, the footprint of the office would go beyond the footprint of the old storage addition. This is an issue because our drain field is located right there in the grassy area and the house needs to be at least 10′ away from it. The image below shows the anticipated footprint in red.
office_location

Next steps? 1.) Convince my husband that being house poor until Micah is in college is a bad idea. 2.) Find out if the office would be in the way of the drain field. 3.) Find a contractor that’s available and willing to help us build a weather-tight shell.

If we can catch a break with this, I expect labor and materials for an unfinished but weather-tight 10’x12′ office addition to be somewhere between $5,000-$10,000. The fees and interest on a $10,000 loan are a little different than higher loans, but we could pay it off in 5 years with a $188 monthly payment and $1,790 wasted on interest. Much better than paying on a loan until I’m 50!

And because I’m always searching for ideas…


Leave a comment

Kitchen Island and Concrete Counters

We decided a few months ago to make a concrete counter for our kitchen island. But before the concrete-mixing fun could begin, there was a lot of other work to do first. The island had a tiled counter with a cooktop in it. But because we bought a free-standing range, we didn’t need it. And we were looking forward to gaining some prep space (especially since we are far from installing the base cabinets and counters in the rest of the kitchen). Nick busted out the cooktop and tile while I ripped off the plywood face and trim.

Next we put up some new luan for a nice smooth finish. I added some lattice, corner, and baseboard trim. After filling in the nail holes and caulking everything, I gave it a few coats of paint and the island was ready for a new counter.

island_progress

We have never made concrete counters before, and used trusty Google to find plenty of tutorials. My favorite DIY concrete counter tutorial was DIY Projects with Pete – How to Build a Concrete Table. Take a look if you want to give concrete tables/counters a try!

Since this was our first go at this, I thought making a “test counter” first was best. That way I could make sure it was what I wanted before going for the big one and potentially wasting supplies and money on something I didn’t like.

I bought rocks to inlay from Ebay and Etsy. Yes, I kind of feel stupid for pay for some rocks, but they needed to be perfectly flat on one side to work. I bought a couple sheets of sliced charcoal/black pebble tile for $18. The rocks were easily ripped off the mesh so that I could use them individually. I also ordered an agate sampler from an etsy seller for $33.25 to use on the big counter. For the tester, I used a couple pieces of agate I already had that my brother gave me years ago.

The process was really quite simple:

  1. Cut a sheet of melamine to the counter top size, and screw melamine trim to the side (available at Home Depot).
  2. Apply silicone caulk on the inside corners so that the edges will be smooth.
  3. Use the same silicone to “glue” the stones to the inside of the form. This will keep them from moving around while concrete is poured in.
  4. Cut some reinforcement that will fit inside the form, leaving about an extra inch of play from each side
  5. Mix some concrete (we used high strength Sakrete) and fill halfway. Place the reinforcement inside and top off with concrete
  6. Bang out bubbles and screed the top.
  7. Remove the form after a few days.

Making the tester

I gave the tester a quick cleaning with some water and a rag, making sure to get the silicone off the rocks. After it was dry, I spent a lot of time filling in air bubbles galore with a paste made from Portland cement and water. We really didn’t give much effort to try to release the air bubbles after the pour. I kind of like the look with Portland-filled-holes. It’s more rough and rustic and not trying to be perfect. Once that was dry, I gave it three coats of concrete sealer. Voila!

tester_done

I wasn’t expecting the edges to be so rough, but I like the way it turned out. This is clearly not going to be the taste of most, but I love it and I don’t have to worry about the kids destroying something like fancy granite. So on to the BIG one!

bigcounter

After the few days waiting period was over, it was time to take the counter out of the form and flip it over. Unfortunately, hubby was on his own because I’m such a weakling. That thing has to be well over 500 lbs! After more air bubble filling and concrete sealing, we finally have some counter space in the kitchen!
big_done1

I’m pretty sure the edges don’t have to be so thick, so if we decide to do concrete for the rest of the kitchen we’ll have to do some more research on required thickness (and find out if our cheap-o cabinets could even support them). But Spring is here and we’re going to pause the kitchen reno and move on to some outdoor projects.

big_done2


Leave a comment

Natural Playgrounds

I have been wanting to create a playground area for the boys for a while now, but am no fan of big brightly colored plastic contraptions that litter the yard. After some searching for ideas online, I came across something new to me: natural playgrounds.

Natural playgrounds blend native material, vegetation, and landforms to create a play area that connects kids to the natural world through unstructured free play. Plus they look really cool.

We plan to create many of these natural play areas throughout the property over the next few years, but will be starting with the small backyard first. We already have some logs to use, and can get some boulders (eventually), but what I really  wanted to do first is put a slide into the hill like this:

slide

I didn’t want to use one of the short, plastic slides you can find stocked in your home improvement stores. But after an quick search online for stainless steel slides, I learned they cost well over $1000. Ouch! So I started casually searching for used ones. To my amazing luck, I found one for sale in our local Facebook classifieds page and got it yesterday for only $200! Fantastic deal. I can’t wait to put it into the hillside and see the kids’ faces!

slide

I had an awesome childhood that was spent climbing trees, digging in dirt, and exploring the woods in upstate New York. We’re fortunate to have acreage here in Washington so my kids can have an equally fulfilling childhood. Adding natural play areas throughout the property will make it that much more special. Let the work begin!


Leave a comment

Spring Forest Planting

A few weeks ago, the ponderosa pine seedlings were planted on the top of the hill. Originally I was only going to order a couple dozen, but they were pretty inexpensive (less than $1/each before shipping). So I ordered 50 seedlings from Plantworks near La Grande, OR, and 50 from Plants of the Wild in Chico, WA. By ordering seedlings from different sellers, we can see who has the best survival rate when planning future purchases. The plants arrived in a day and in great condition from both sellers. I don’t know how old the seedlings from either seller were, but the ones from Plants of the Wild were considerably larger.

Seedlings from Plants of the Wild

Seedlings from Plants of the Wild

We were lucky enough to have a forester friend I work with come and help. Although I hiked to the planting area, I wasn’t much help with two toddlers to look after. So the fellas carried on and got everything done in less than two hours while I took the kiddos back down and got lunch ready.

We’ll be heading up there soon to place tarps around each seedling, hoping to increase the survival rate. Feeling optimistic, I pre-ordered 300 more ponderosa pine seedlings for the fall planting from the University of Idaho (who was all out this Spring). After a couple years has passed and the pine is established, we plan to add some Douglas Fir. Because Ponderosa is so much more hardy and our planting area is on a tough site, it’s best to establish those first. This will create a microclimate and some shade to help other, less hardy tree species get established.

Jesse next to the very first planted seedling!

Jesse next to the very first planted seedling!


Leave a comment

Back Deck Makeover

The small deck in the back was covered in peeling red and white paint. Although it’s one of many things that will eventually be torn out, we’re far from that and in the meantime we’re stuck looking at it. So we went ahead with lots of scraping. sanding. and staining.
Deck_BeforeAfter
Lots of the paint easy scraped off, and the kids were happy to help. The belt sander took care of the rest. A couple boards had to be replaced, an old satellite dish was removed, and then the deck was ready to stain.

IMG_6912

IMG_6915

I kind of like it better with just one coat (below), but it’s much better than it was before!

deck_1coat